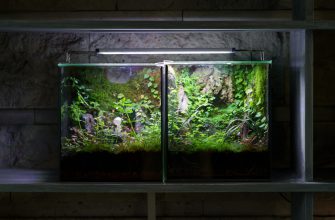
LED furniture lighting is not just a fashion trend. LED lighting of niches and shelves allows you to give the whole environment a stylish and modern look, add convenience to your life, make the space more voluminous and functional.
With such illumination, it is not necessary to turn on the overhead light in the living room to choose a volume for evening reading in the bookcase. Collectible statuettes and decorative items on the shelf will look like exhibits in a museum – everything is well illuminated, and you can choose the light to your liking. For the design of cabinets and shelves in the kitchen, lighting will also be very appropriate – the contents of the cabinets are visible at once, no need to waste time looking for the right ingredients. For a dining room with a bar counter, LED lighting is a 2-in-1 solution – it provides good visibility and creates the right atmosphere.
There are many options for using furniture lighting in home interiors. The auxiliary light can be installed in almost any niche and on any surface. Backlit furniture is usually made to order – it’s not a cheap pleasure. To save money, you can buy ordinary cabinets/shelves (without bulbs) and install the backlight yourself – choose a solution to your liking, choose the color of emission and other parameters of the LED lamp used, supplement the scheme with a dimmer, and connect remote or touch control.
How to make LED furniture lighting yourself
Do-it-yourself lighting of shelves or cabinets will be no worse and at the same time much cheaper. The components used are the same, but there is no need to pay for the work of craftsmen. You can also choose materials and components according to the price/quality ratio, which means that you can fully control costs. As a bonus, you will acquire new skills that are not superfluous in life. And in general, it’s just great to make something with your own hands and see that it works successfully!
What you need to make shelf lighting
Lighting for furniture is easiest to organize using LED strip – an energy-efficient and durable, reliable and practical, inexpensive and easy to install light source. To assemble a working backlight for furniture, you will need:
- LED strips. You can choose the glow color and brightness individually.
- Profile. An aluminum box with a lens/shade. In principle, you can do without the profile, but the aluminum lining (the box wall) removes heat well and increases the life of the LED strip. Often, the profile itself also complements the design.
- Power supply. The LED strip cannot be connected directly (without an adapter) to the mains, since the LEDs operate on a low voltage of 12/24 V.
- Connecting wires and connectors (or a soldering iron).
- Dimmer (dimmer) and motion/light sensors are optional.
- A toggle switch or remote control (remote control, smart program) for switching on and controlling the backlight.
A wide variety of LED strips and accessories will delight any home craftsman – the illumination of shelves and niches can be organized for almost any application.
Where to start
First of all, you need to understand the peculiarities of installing LED lighting for a particular shelf or cabinet. The set of components that you will need to install the lighting, and the result itself, depends on these “little things”:
- We determine where it is best to place the LED strip to make the lighting as efficient and convenient as possible. The options are the front side (end) of the shelf, on the back wall, or a combined method.
- Where and how to install the switches.
- How we will connect to the 220V network.
From the point of view of practicality, it is advisable to build the LED strip above the shelf. This method can be used even for an open strip. In this case, a high level of illumination is created, and the LEDs are protected from mechanical damage as much as possible.
The shelves must be measured to determine the required length of the profile and LED strip. Please note that the strip can only be cut at certain points – they are marked on the strip itself!
To cut the profile, you will need a hacksaw, while the LED strip can be cut with ordinary scissors. The wires can be connected by soldering, but there is a more convenient and reliable way – use special cables with connectors.
Choose the power supply according to the power of the tape to be connected and its operating parameters. To turn on/off the backlight, you can install a standard toggle switch, use a motion sensor switch, or connect the remote control.
 LED lighting options for furniture
There is no fundamental difference between the technology for installing LED lighting in a wardrobe in a dressing room, open hanging shelves in a living room, or in a kitchen cabinet. You can install additional light on surfaces made of wood, chipboard, MDF, and glass. The method of installation depends on the material of the shelf, and therefore the list of components. Let’s consider the two most common options:
- CHIPBOARD. LED lighting on chipboard shelves can be installed on the facade (end), on the back wall, or both. The easiest way to install the profile is to use plastic clips – if necessary, the luminaire can be easily removed at any time without the use of additional tools.
- Glass. Glass shelves can be supplemented with lighting both at the end and on the top or back wall. LED lighting (strip, mini linear LED lamps) is attached to the fragile base material with glue or special clips.
In a closed cabinet (doors without glass), it is advisable to install the switch outside near the door or inside near one of the shelves. To avoid drilling extra holes and make the use of the backlight more convenient, use a motion sensor in the circuit – the light will turn on as soon as you open the door.
For the independent manufacture of illumination of shelves and cabinets, you can buy everything you need from us at Led-Story. LED strips and accessories are available in a wide range. Go to the catalog and choose the best LED lighting option for your furniture!
